
Quick Start
Get a talking character into your Unity scene
The Neocortex Unity SDK connects the characters you build on the web platform to your game.
There are two ways in. Flow 1 is one component: add it, pick a character, press Play and talk, with nothing else in the scene. Flow 2 adds the chat UI when you want the conversation on screen. Both start from the same setup.
Requirements
- A Neocortex account, sign up here
- Unity 6 (6000.0) or above, download here
- Git, download here
Setup
Install the package
- Open your Unity project
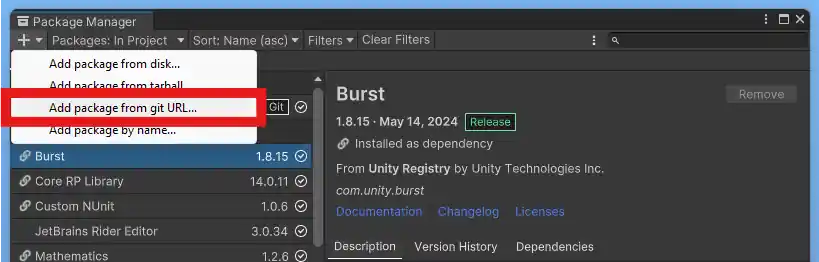
- Go to
Window>Package Manager - Click
+and chooseAdd package from git URL - Paste
https://github.com/neocortex-link/neocortex-unity-sdk.git - Click
Add
Paste your API key
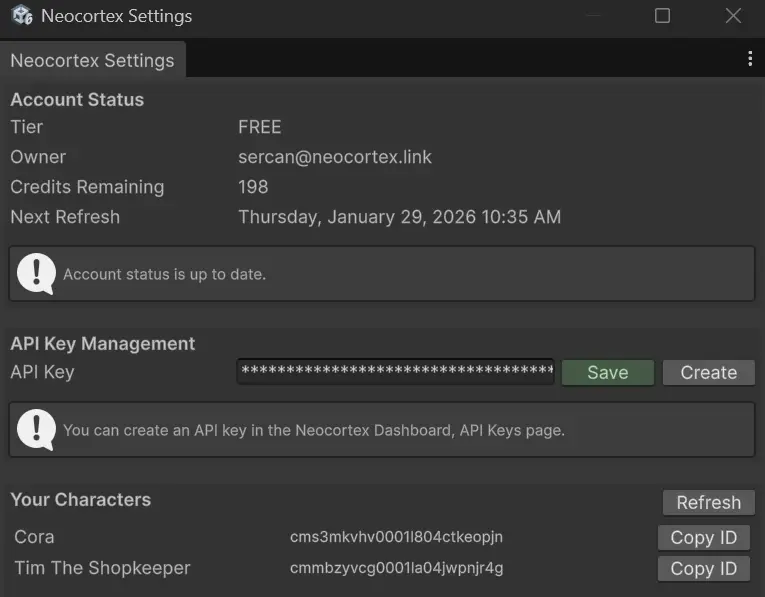
The Neocortex Settings window opens by itself the first time the package is installed. You can reopen it any time from Tools > Neocortex > Settings.
- Create a key on the API Keys page
- Paste it into the
API Keyfield and pressSave
The window validates the key, shows your plan and remaining credits, and lists the characters on your account.
Flow 1: A character you can talk to
No canvas, no chat panel, no code.
Add a Smart Agent
Create an empty GameObject and add the Neocortex Smart Agent component to it.
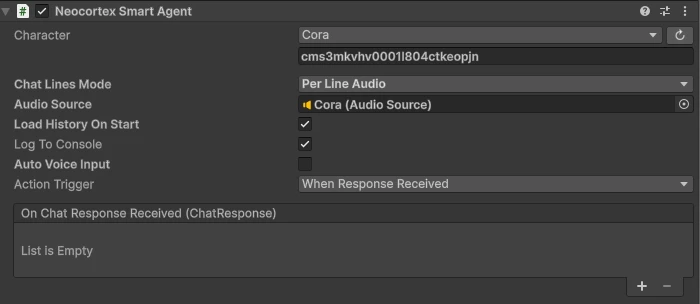
That is the whole setup. Because the agent starts in an audio mode, it brings an AudioSource for the character's voice and a NeocortexAudioReceiver for the player's, so the GameObject can already hear and speak.
Pick your character
On the Neocortex Smart Agent component, choose a character from the dropdown. The list is fetched from your account, so there are no ids to copy.
Press Play and talk
Speak. The microphone opens on its own, sends what it hears, and listens again after every reply. The character answers out loud when a voice is configured on the web platform, and the Console prints each line it says and each action it asks for.
Both conveniences are suggestions
The audio pieces arrive when you first add the agent, and again if you switch into an audio mode later. Delete either one and it stays deleted. Turn off Auto Voice Input when something else should feed the agent, and it stops touching the microphone.
Flow 2: A character with a chat UI
When you want the conversation visible, scaffold the UI instead of building it.
Scaffold the scene
Right click in the Hierarchy and choose Neocortex > Complete Voice Chat, or Complete Text Chat if you only want typing.
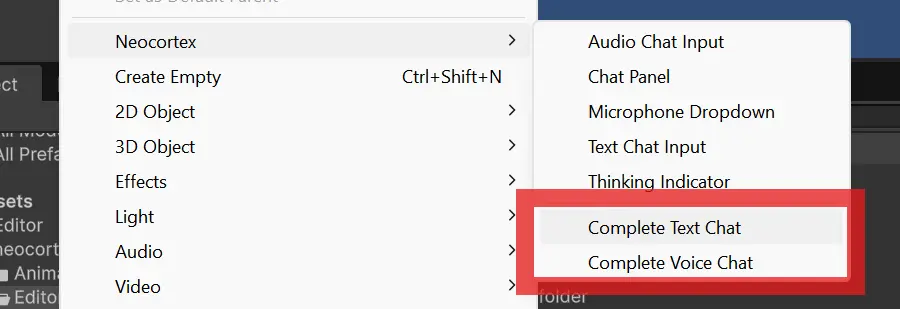
This places and wires the whole rig: the chat panel, the input, the thinking indicator, and a character object carrying the Smart Agent and its audio. There is nothing to drag.
Pick your character
Select the character object in the Hierarchy and choose your character from the same dropdown as in Flow 1.
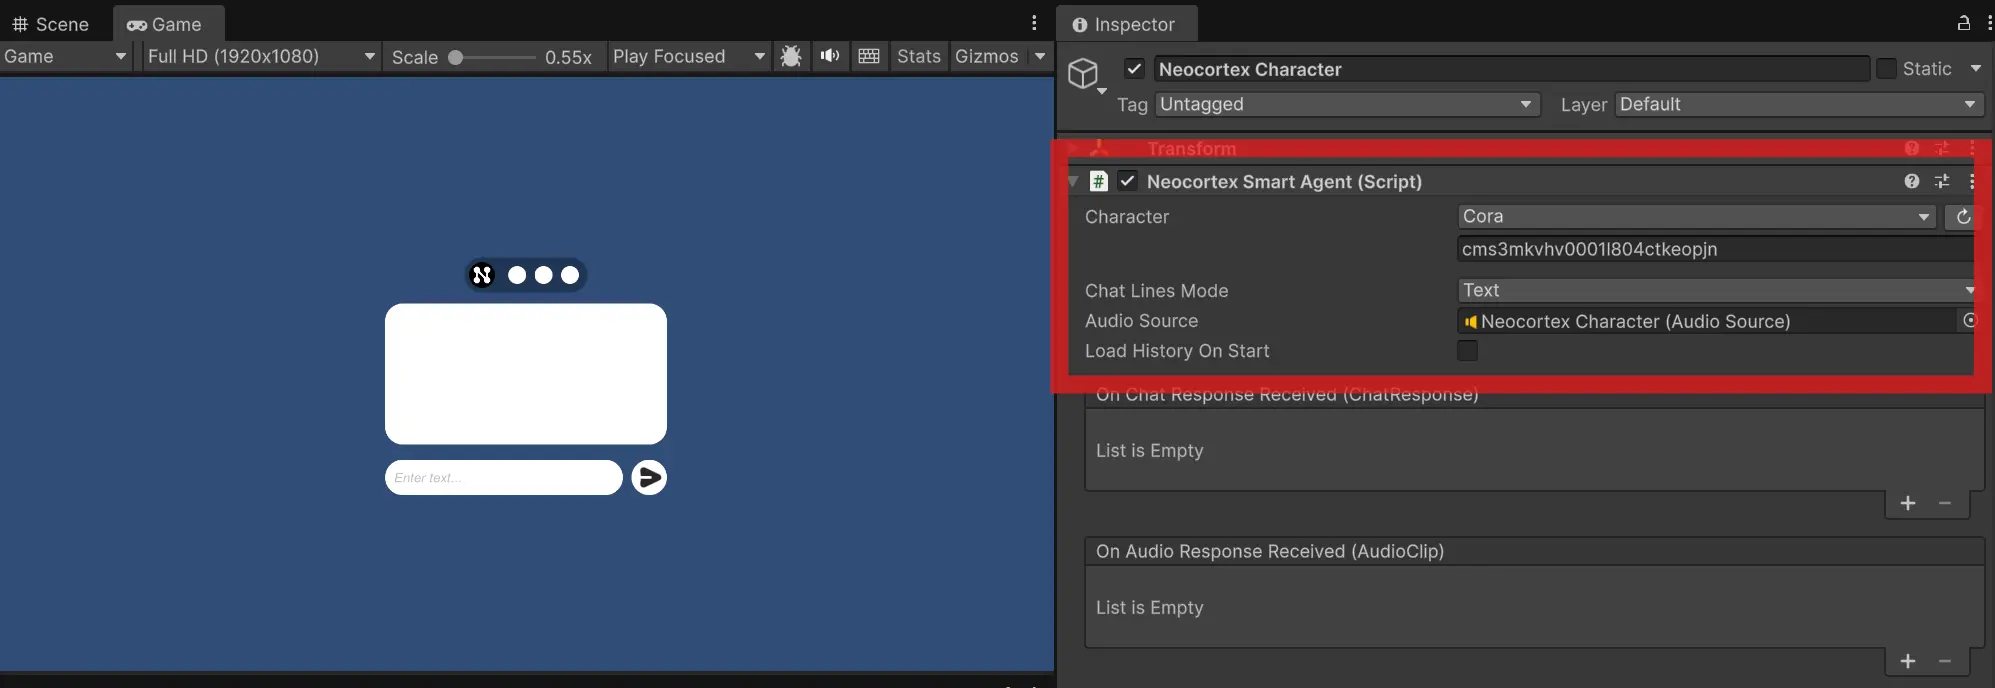
Press Play
Type a message, or speak if you scaffolded voice chat. Replies arrive in the chat panel, line by line, and are spoken out loud when a voice is configured.
The chat UI takes over the microphone, which switches the agent's Auto Voice Input off automatically, so the player's speech is never sent twice.
See UI Elements for what each piece does and how to restyle it.
Talking to it from code
Wire your own logic to the agent whenever you want to drive it yourself.
using UnityEngine;
using Neocortex;

public class Talk : MonoBehaviour
{
    [SerializeField] private NeocortexSmartAgent agent;

    private void Start()
    {
        agent.OnChatResponseReceived.AddListener(response =>
        {
            Debug.Log(response.message);
        });

        agent.TextToText("Hello!");
    }
}